Do you want to learn how to replace a Kohler toilet flush valve? Yes, I want to know how to replace these Kohler toilet flush valves. First, put off the water supply to the toilet and flush to empty the tank.
Then, remove the old flush valve by disconnecting the water supply line. Lose the screw valve from the bottom of the tank, and install the new valve.
You can achieve this by following simple basic steps with the right tools and .from my 7 years knowledge of experience.
There are other things you need to know before you consider replacing the valve, and I have explained all this in this article.
Let’s get started.
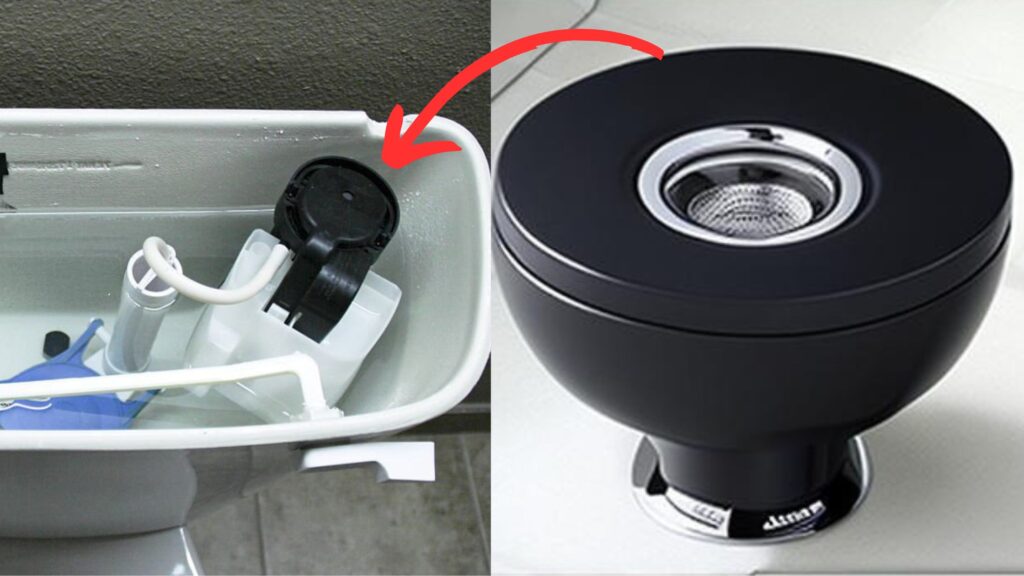
Steps to replace Kohler toilet flush valve
If you have the correct equipment and follow the procedures carefully, replacing a Kohler toilet flush valve may be straightforward.
But you must be careful to consider some things when trying to replace your Kohler toilet flush valve to avoid problems.
When changing a Kohler toilet flush valve, it is common for it not to fit due to size, shape differences, or corrosion.
In addition, plumbing problems and water leaks can result from incompatibility.
Use a flapper designed for Kohler rectangular overflow flush valves to fit all Kohler toilets using this style valve. Here’s a step-by-step procedure:
It would be best if you had these tools:
- Adjustable wrench
- Channel-lock pliers
- Screwdriver (flathead)
- Replacement flush valve kit
Here are the steps involved in Installing a new toilet flush component here is how to do that:
Remove The Old Valve
- Put off the water supply and drain the toilet tank. This is usually done by turning off the valve located behind the toilet.
- Measure the present flapper’s chain length and the distance between the flapper chain and the hook.
Take note of the hook placement. - Remove and discard the old flush valve. Remove any debris, sealant, and water from the tank bottom. Make sure the flush valve hole at the tank’s bottom is clean.
New Valve Installation - Twist the valve lugs inward. Next, place the flush valve over the hole in the tank bottom and put it into the hole. Next, place the flush valve so the overflow tube is towards the nearest side wall.
- Swing the valve lugs outward so they reach under the tank hole’s bottom edge. Tighten the valve lugs evenly using a screwdriver. Check that the float ball is not in the way of the flush valve.
- Connect the flush valve flapper. Attach the chain hook to the hole at the end of the trip arm after repositioning the chain hook on the chain to allow minimal slack when the flapper is seated.
- From the interior of the tank, apply silicone lubricant to the moving parts of the trip lever. Push the trip lever several times to ensure that the trip lever and flapper rise and reseat smoothly.
Adjust the strip lever, chain hook, flush valve, and float ball to guarantee trouble-free operation.
- Remove and discard all excess chain links.
- Open the water supply and flush the toilet
- Reattach the tank to the bowl and secure it with the two nuts.
- Now, you reopen the water supply to the toilet and test the new flush valve.
- Adjust the water level in the tank when necessary.
Following these steps, you will surely have a lasting well, replaced Kohler toilet flush valve. Just make sure to check often and act whenever you see leaks.
How do I know what Kohler toilet flush valve I need?
To know what Kohler toilet flush you need, you must first check for the model number in your toilet; practically all Kohler toilets often require a particular part number.
After you have the number of the Kohler toilet flush valve, you can then use that for your findings. on the Kohler parts locator on their website to locate the proper flush valve for your toilet.
However, for me, I usually take my old part to the shop and compare it one-on-one.
Are Kohler toilet flush valves universal?
No, the Kohler toilet flush valves are designed to fit a their own model. The way they are built is that each Kohler toilet has its unique flush valve to fit a particular model.
How To replace the seal on a Kohler flush valve?
It’s simple: as you follow the steps below, you will find that you can Replace a flush valve seal on a Kohler toilet by yourself if you already have a technical background:
- The first practice is to shut the water supply line. Just ensure you also empty the tank completely
- Bring out the chain and lever connecting the flush valve to the handle inside the tank.
- Remove the refill tube from the top of the flush valve cartridge.
- Turn the rod counter-clockwise within the canister until you can draw it out, then pull the remainder of the toilet out.
- Remove the old seal and place it with a new seat in place.
- When you have put the rod into the cartridge, turn it to the right to tighten it in place.
- Put the refill tube into the top of the flush valve cartridge.
- Finally, reattach the chain and lever to the part of the toilet handle inside the tank.
- Re-open the water supply to the toilet by turning the shutoff valve to the left.
- Ensure the tank fills, and check for leaks properly
Replacing a Kohler Flush Valve Seat
A leaking Kohler class 6 flush valve may be due to a damaged one, which means you have to replace it.
The tank flush valve seat is the unit’s base where the flush valve seal sits, and the gasket and seat must always fit together.
You can only repair minor issues when your kohler flush valve seat is having issues, But if there is severe issues around the seat, replacing it will be the only out.
- Shut the water supply and detach the supply line from the fill valve.
- After inserting the rod into the cartridge, turn it right to secure it. Then, absorb the remaining water with a sponge or towel.
- Disconnect the tank from the tank by unscrewing the tank-to-tank bolt nuts under the rim of the tank using an adjustable wrench.
- Raise the tank from the bowl and place it on a bath towel. Remove the old black foam gasket from the lock nut bolt lock at the bottom of the tank.
- Unscrew the flush valve jam nut using a large pair of slip joint pliers. Disconnect the lift chain by hand after separating the little black rubber filler tube from the top of the flush valve.
- Next, pull the flush valve assembly out of the tank. The tank mounting plate will separate when the valve is removed.
- This time, Unscrew the filler tube, the thin plastic tube in the center of the flush valve, from the flush valve seat. The flush valve reservoir and gasket will separate from the fill tube.
- Install the new flush valve seat using a new stem washer and bowl-to-bowl gasket.
- Reassemble the parts in reverse order. Connect the water line back and turn on the water.
Flush the toilet many times to ensure proper toilet operation.
Conclusion
I have shown you how to replace a Kohler toilet flush valve. You must never forget to follow the basic setup steps to avoid unnecessary problems when the Kohler toilet flush valve needs to be appropriately connected.
However, you should also reconnect the water supply, check for leaks, and test the new flush valve by flushing the toilet several times to ensure it works properly.
Ensure the tank lid is reattached well and water from the installation area.
Further Reading: